
Installeer de app
How to install the app on iOS
Follow along with the video below to see how to install our site as a web app on your home screen.
Opmerking: This feature may not be available in some browsers.
Het bekijken van dit forum als gast is beperkt
- Je hebt een beperkt aantal paginaweergaven als gast over
- 1 Resterend aantal gast weergaves
- Registreer nu om deze kijklimiet te verwijderen
-
Vragen? Wacht niet langer op de antwoorden! Login of Registreer en plaats jouw vraag! Wij zullen je vragen z.s.m. beantwoorden.
Je gebruikt een verouderde webbrowser. Het kan mogelijk deze of andere websites niet correct weergeven.
Het is raadzaam om je webbrowser te upgraden of een browser zoals Microsoft Edge of Google Chrome te gebruiken.
Het is raadzaam om je webbrowser te upgraden of een browser zoals Microsoft Edge of Google Chrome te gebruiken.
-Tainted Freshly Squeezed-
- Onderwerp starter barfastic
- Startdatum
barfastic
New member
Thank you Kenny!Its in the details my friend!
I cant wait till its done either!! (Im on a duo core Centrino! lmao)cant wait till the build is done i keep reloading those pages
nothing is perfect but this build is coming close.....very close.....
barfastic
New member
Finally got the parts i ordered from the waterjet!


They are exactly how i wanted them!!!
can anyone guess what they are?
They are leftovers The real peices are these!

Drilled for M4 tap, and then countersunk...


Screwing in each screw on opposite sides lock the reservoir into place.

Ignore the length of the actual screws, according to my calculations if i use M4 x 20mm screws, they will sit flush and be tight enough to hold the reservoir!

This is how i think i will stack them

The peices that ahve a small triangle are the ones that will be bolted to the motherboard plate using M4 or M5 screws.


Heres a general shot...

I also weighed them
4 rings

5 rings

They are each about ~200 grams...
and a quick test i did jssut to see if it fits!....
voila!


I hope you enjoyed... I will be taking them to be powder coated tomorrow, so i hope everything turns out good
Until next time,
Happy modding!
They are exactly how i wanted them!!!
can anyone guess what they are?
They are leftovers
The real peices are these!
Drilled for M4 tap, and then countersunk...
Screwing in each screw on opposite sides lock the reservoir into place.
Ignore the length of the actual screws, according to my calculations if i use M4 x 20mm screws, they will sit flush and be tight enough to hold the reservoir!
This is how i think i will stack them
The peices that ahve a small triangle are the ones that will be bolted to the motherboard plate using M4 or M5 screws.
Heres a general shot...
I also weighed them
4 rings
5 rings
They are each about ~200 grams...
and a quick test i did jssut to see if it fits!....
voila!
I hope you enjoyed... I will be taking them to be powder coated tomorrow, so i hope everything turns out good
Until next time,
Happy modding!
barfastic
New member
So ive been pretty busy getting things sorted today...
got my res holders back from paint shop. They arent perfect, but i did manage to get them painted for free... so im not complaining


At the moment i am lining them up and trying to get all the bolts to sit flush.

It was ahrder than i thought it was going to be, i have to individually file each screw to size because although i calculated the design for it to fit with 20mm screws, each screw is a little off, ranging from 19.3mm to 21 mm, so 2mm off makes the head stand out.
on another note i took care of my hidden lighting idea. We recently renovated our kitchen and replaced our old fluorescent ligts with led strips. and we placed them inside some sort of holder.
This is angled at 45 degrees

here is the panel that gets mounted so you can clip it in to position.

then you can either place see through or white plexiglass, i went with white plexi

12V Led strip 14,4W, this thing is pretty bright... iw asnt expecting it to be sooo bright D:

The Led strip goes into the profile and stays in place with double sided sticky tape.


Slide in the plexiglass


And we have the completed lighting setup!

Total = ~15-20 euros for 1M of lighting.
Now i have to cut it to length and figure out where i want to put them
got my res holders back from paint shop. They arent perfect, but i did manage to get them painted for free... so im not complaining
At the moment i am lining them up and trying to get all the bolts to sit flush.
It was ahrder than i thought it was going to be, i have to individually file each screw to size because although i calculated the design for it to fit with 20mm screws, each screw is a little off, ranging from 19.3mm to 21 mm, so 2mm off makes the head stand out.
on another note i took care of my hidden lighting idea. We recently renovated our kitchen and replaced our old fluorescent ligts with led strips. and we placed them inside some sort of holder.
This is angled at 45 degrees
here is the panel that gets mounted so you can clip it in to position.
then you can either place see through or white plexiglass, i went with white plexi
12V Led strip 14,4W, this thing is pretty bright... iw asnt expecting it to be sooo bright D:
The Led strip goes into the profile and stays in place with double sided sticky tape.
Slide in the plexiglass
And we have the completed lighting setup!
Total = ~15-20 euros for 1M of lighting.
Now i have to cut it to length and figure out where i want to put them
barfastic
New member
Thanks!Looks good!
No, because i decided to scrap them for a v2!Very good.
Do you have a pic of them in the dark?
So i wasnt very pleased with the outcome of my res holder rings...
So i started re-designing by hand...

the idea is to cnc rings that would do this, and depending the radius of the reservoir i can tighten so the plate would touch the reservoir with mybe some sort of elastic material for grip...
The problem is i want the bolt of the screw to remain stationary so it is always flush....

Something like this.... Maybe have two seperate rings a top and bottom so screws can be easily replaced and fixed incase of error/problem.
I made up a few digital versions using illustrator too...
My design consists of 4 peices. Top and bottom ring, bolt, and pressure plate...


By turning the screw, this is the outcome i wanted to acheive...

So after that was done and i checked and double checked my dimensions etc,
i designed a section in autocad, so that i can send to companies to get price offers.
so this is where i am at the moment...


still need to create the pressure plate, but it may take a while, because i am useless when it comes to autocad!
hehe...
until next time,
Happy Modding
barfastic
New member
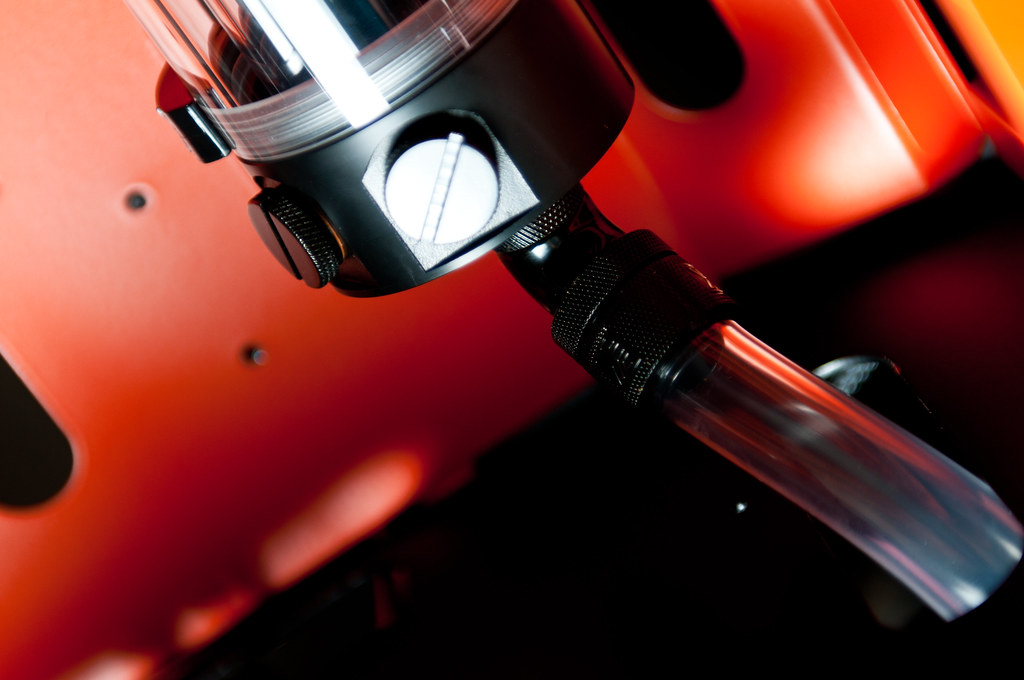
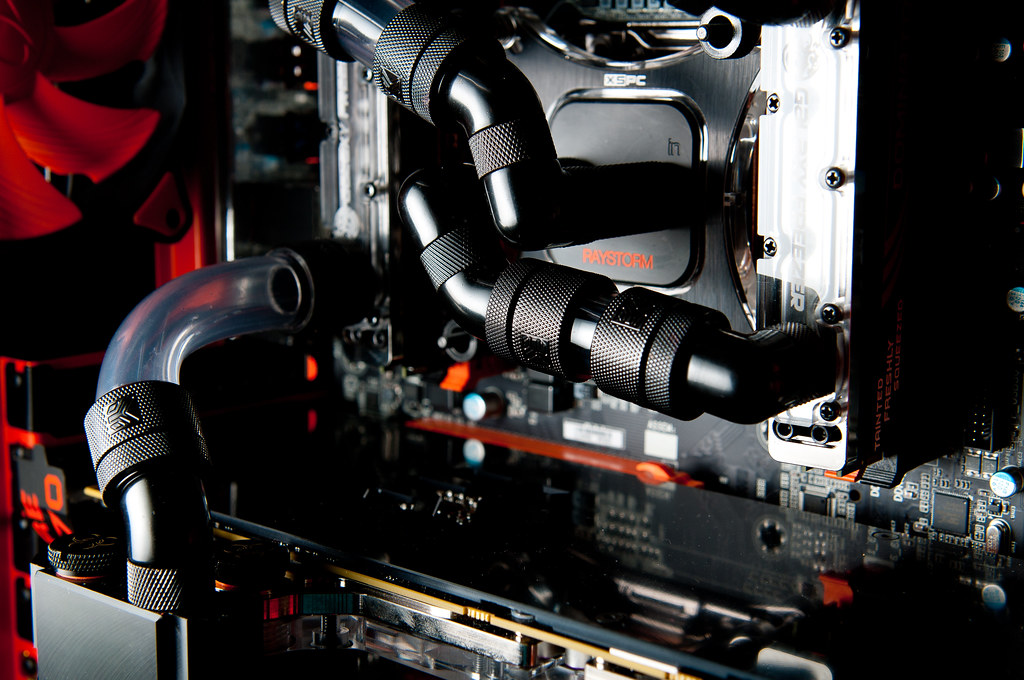
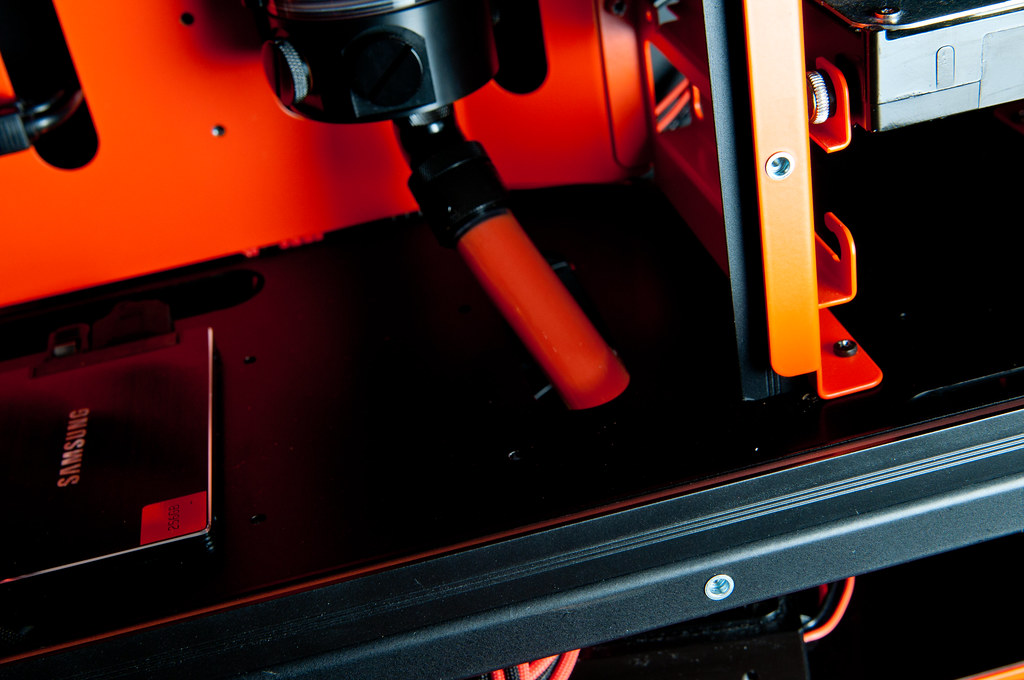
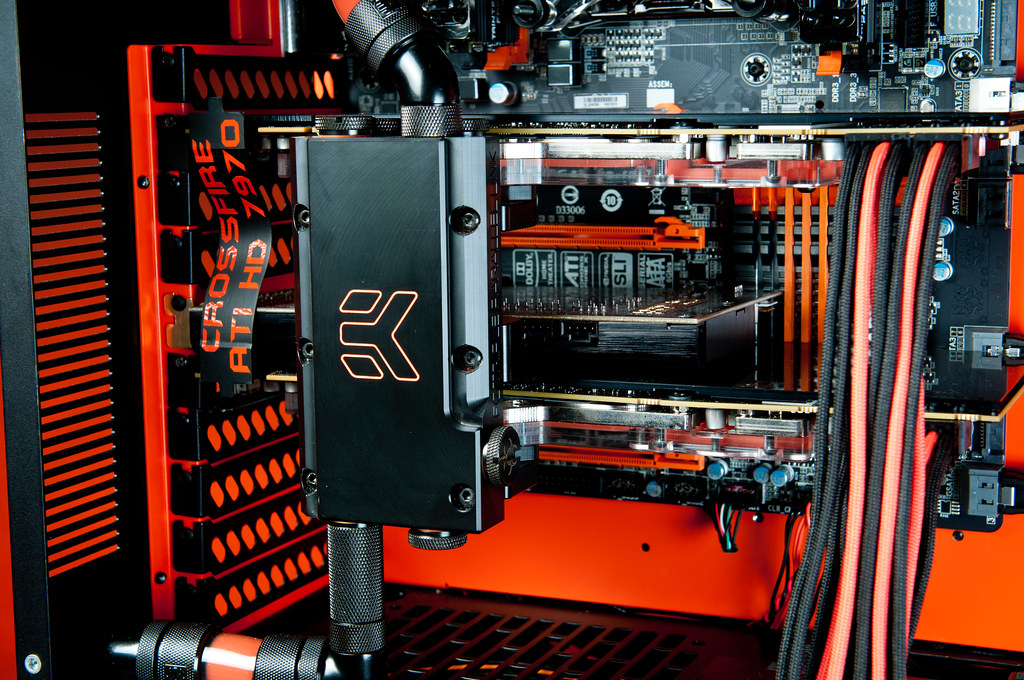
So i placed the EK reservoir for now... and i cant say i dont like it, but its not my "vision" either.
What do you think?

I added a fitting to loop a tube to the rear so i can fill up the loop easier.

I also connected the radiators to the loop, and placed my drain valve.

Thats it for today, tomorrow i will most likely put the pump in, and then its cable management time :/
What do you think?
I added a fitting to loop a tube to the rear so i can fill up the loop easier.
I also connected the radiators to the loop, and placed my drain valve.
Thats it for today, tomorrow i will most likely put the pump in, and then its cable management time :/
barfastic
New member
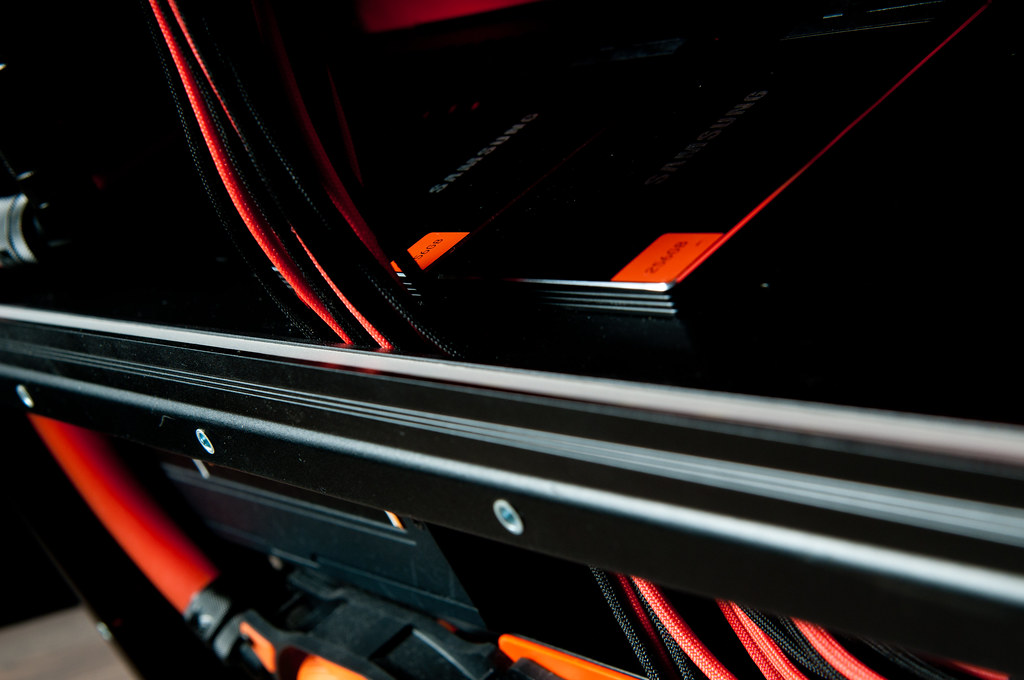
So as i have been spammin i need te system running by monday, and right now im leak testing!
But here are some photos so you guys can see...
The coolant that will be used
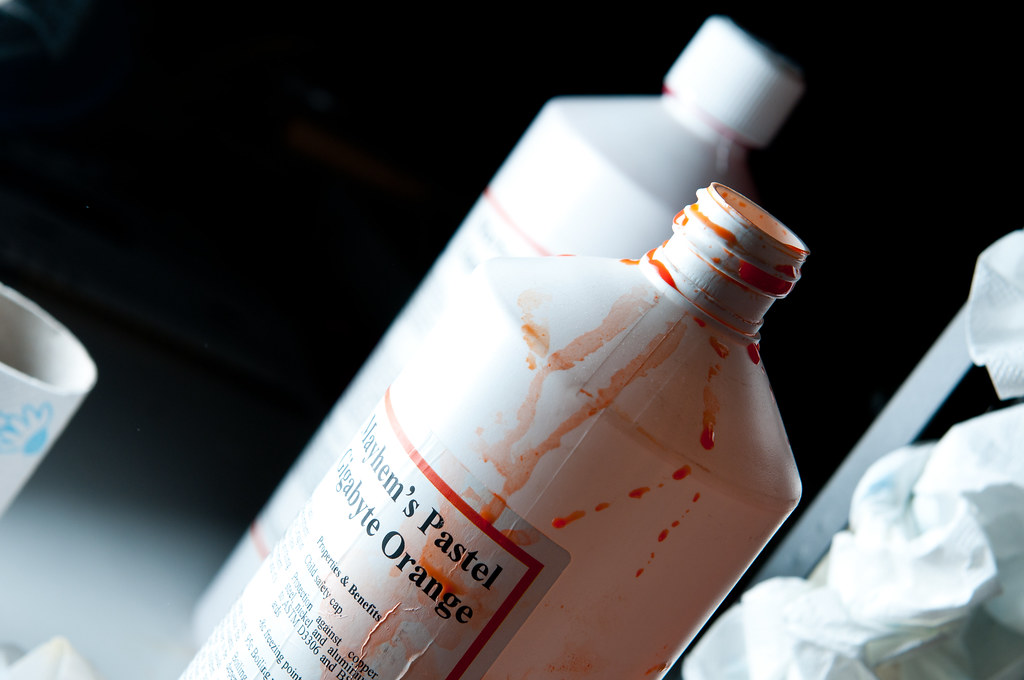
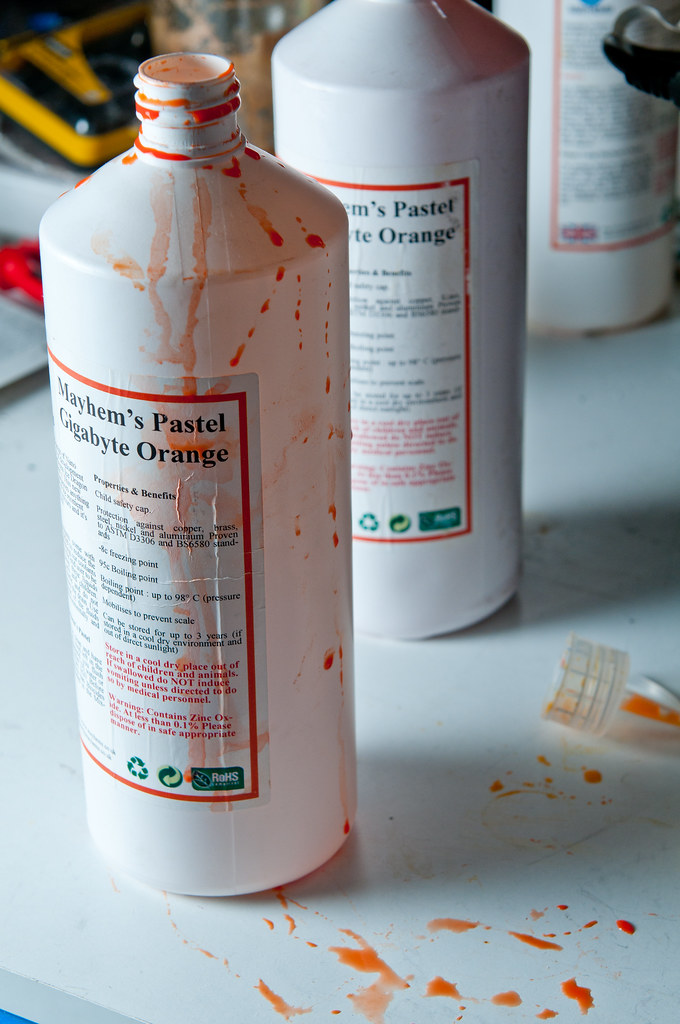
The color was a little bit too pale for my likings, so i went ahead and added some red dye to get it the color i want...
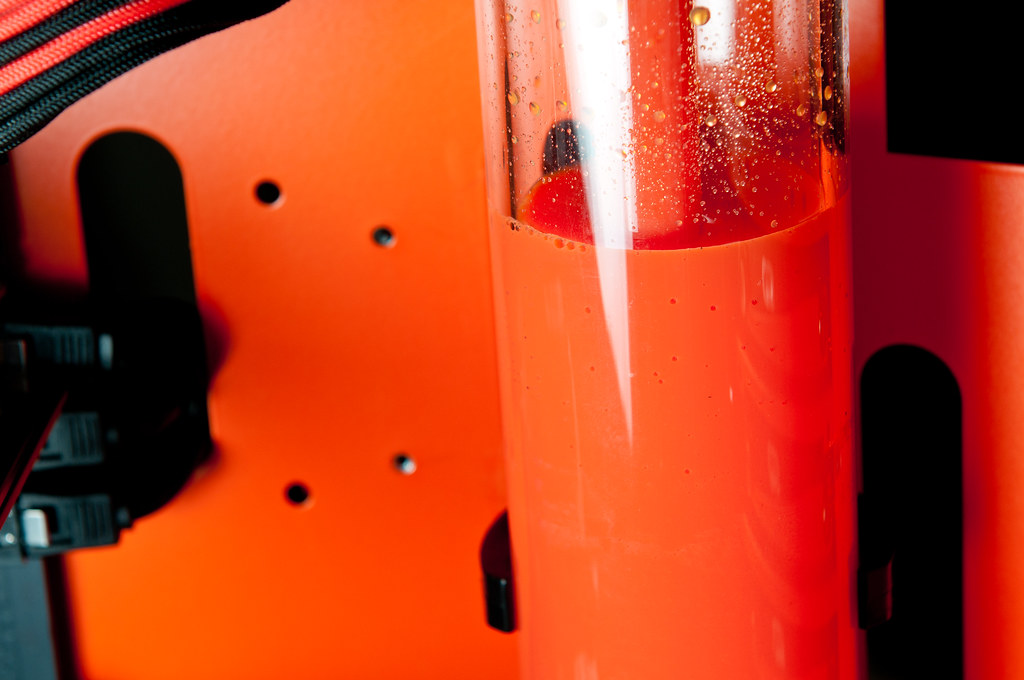
I think the shade turned out quite well, and the coolant matches the rest of the parts.
Right now its bleeding, and there are no leaks
Once the bleeding finishes and im sure its leak proof, ill take some complete photos
Untill then have a nice day
Just want to shout out to Freddy, for helping me out with the sponsorship. Without him, this would never be done!
But here are some photos so you guys can see...
The coolant that will be used
The color was a little bit too pale for my likings, so i went ahead and added some red dye to get it the color i want...
I think the shade turned out quite well, and the coolant matches the rest of the parts.
Right now its bleeding, and there are no leaks
Once the bleeding finishes and im sure its leak proof, ill take some complete photos
Untill then have a nice day
Just want to shout out to Freddy, for helping me out with the sponsorship. Without him, this would never be done!
barfastic
New member
Thanks KennyVerry nice to see !
I finally got the final parts needed to complete this build!
Its a little fan bridge to 6pin pcie!


With this in hand, and the led lighting coming together, it seems that i will finally finish the build and be able to fully photograph it
barfastic
New member
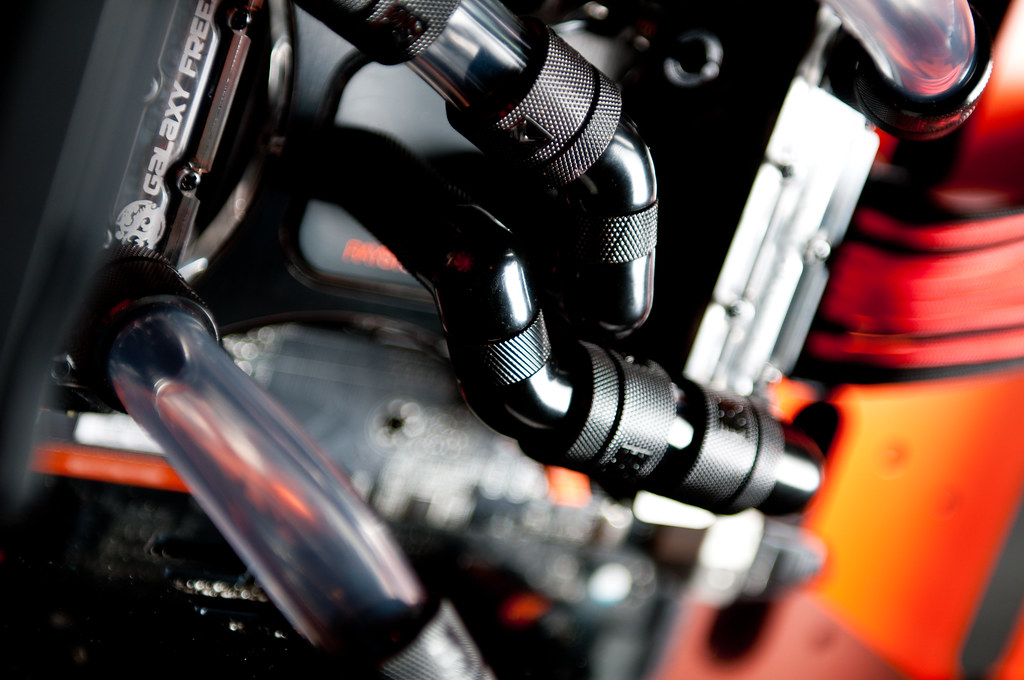
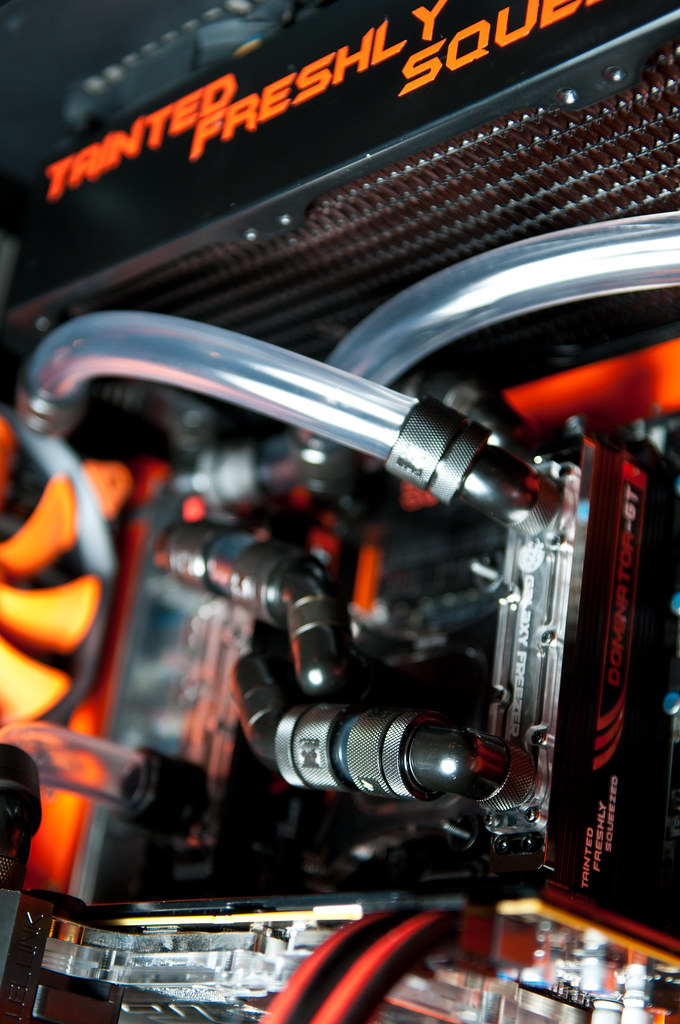
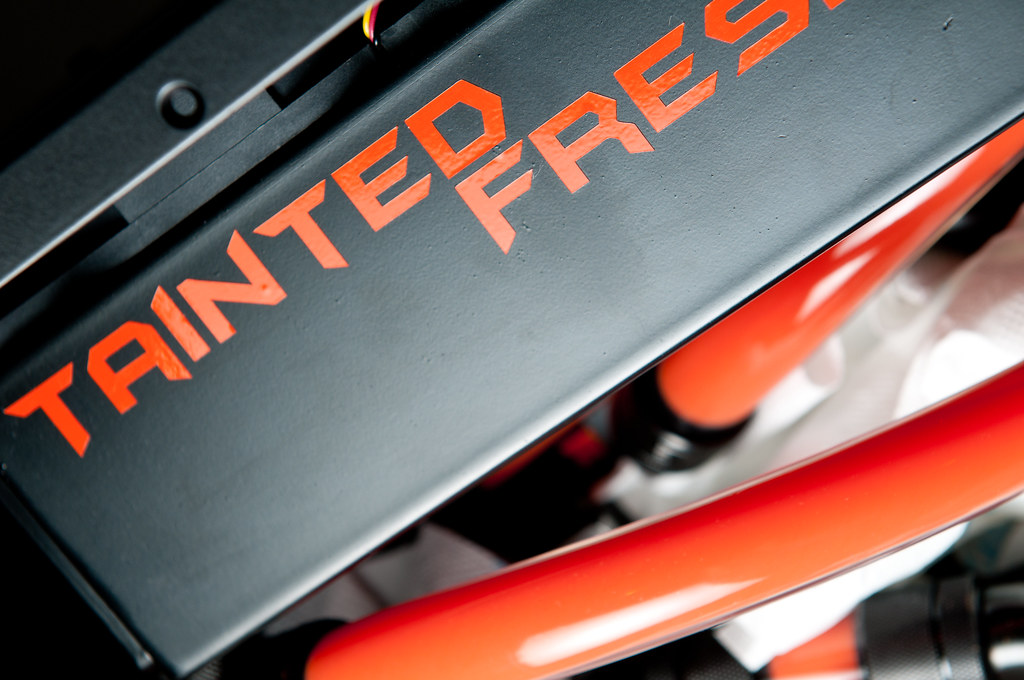
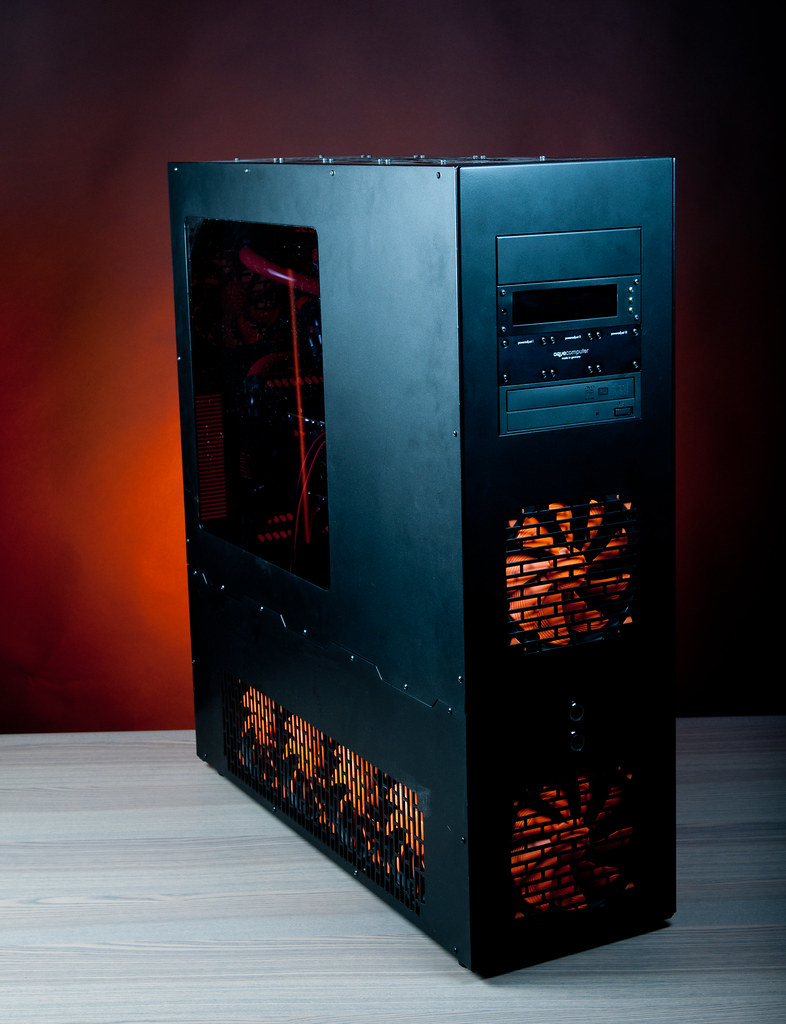
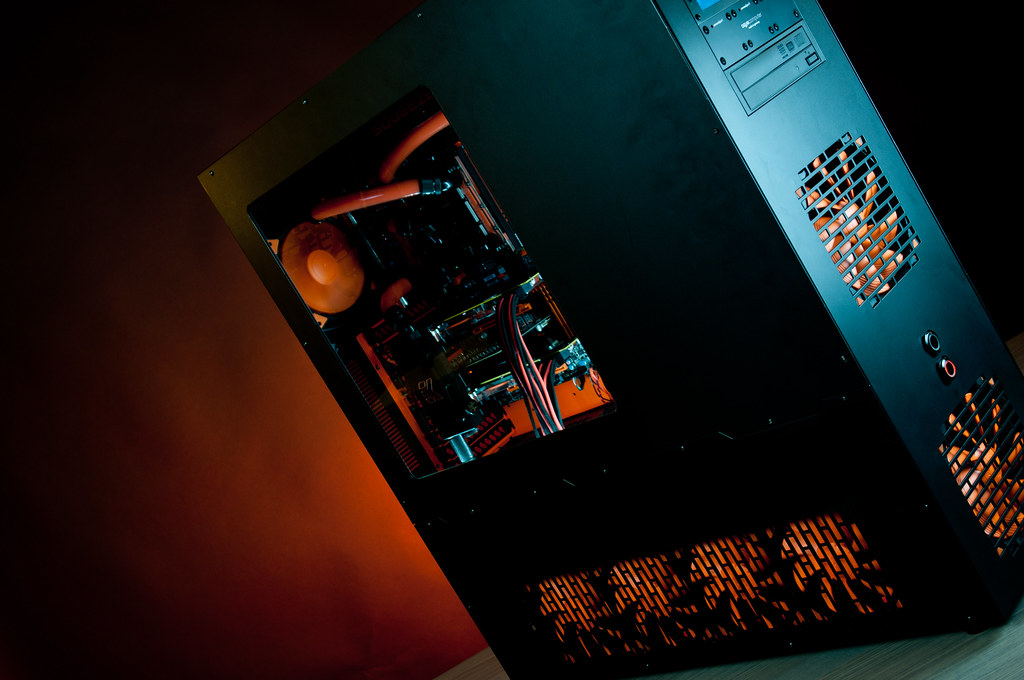
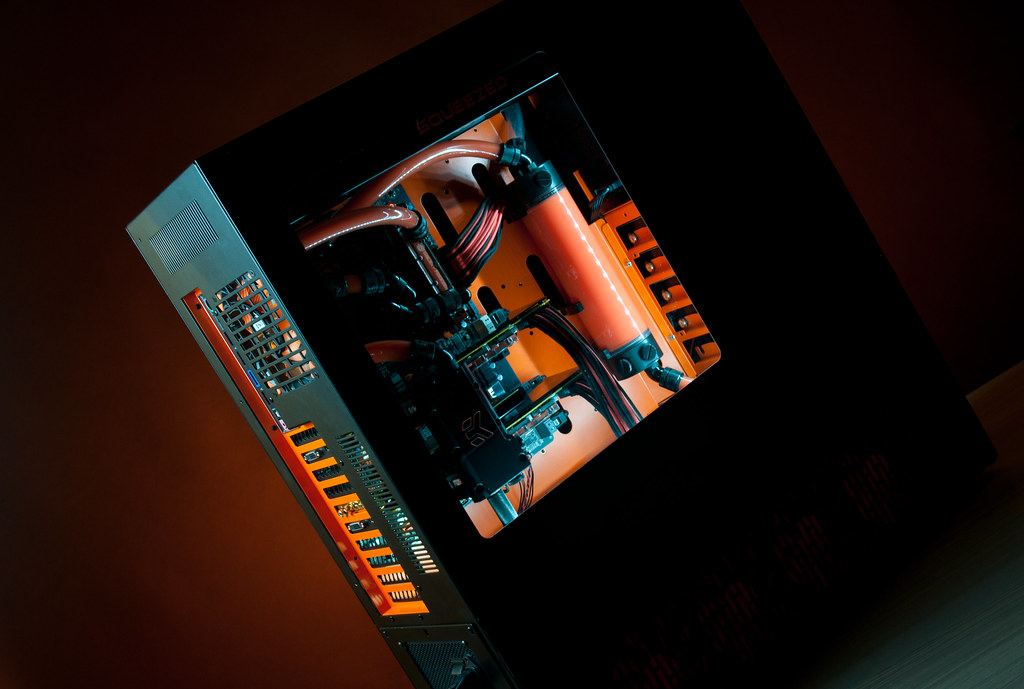
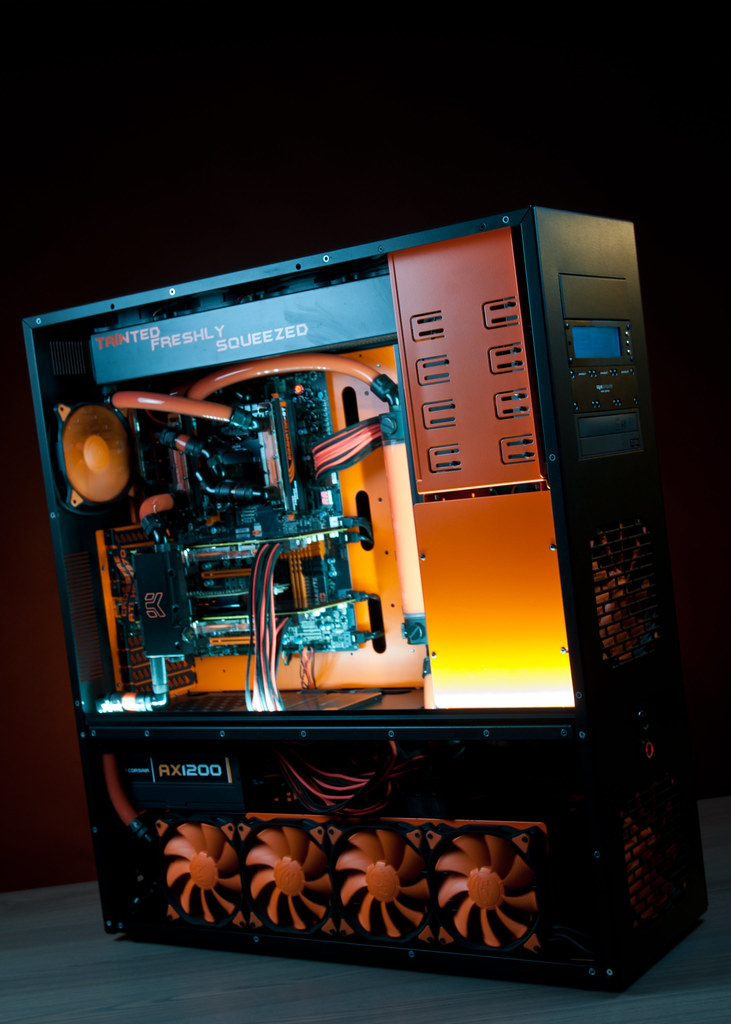
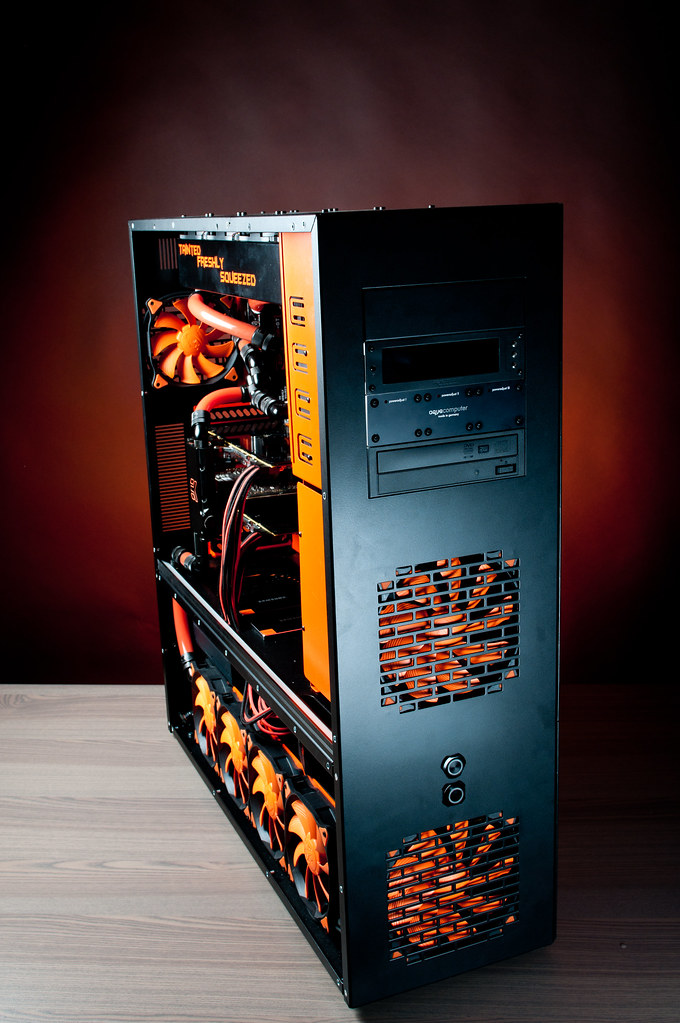
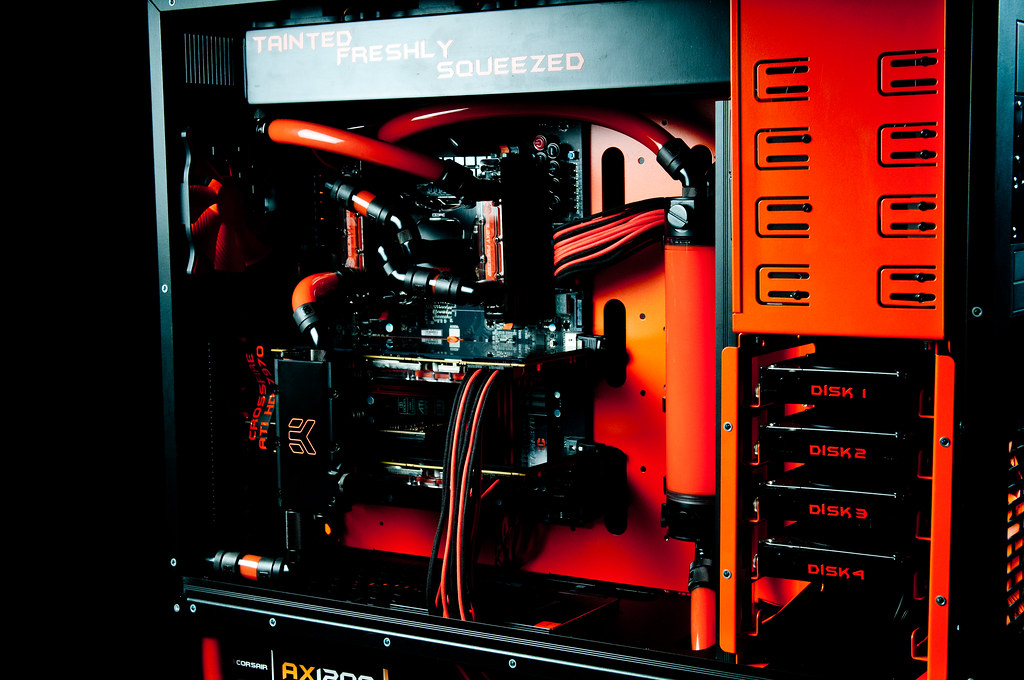
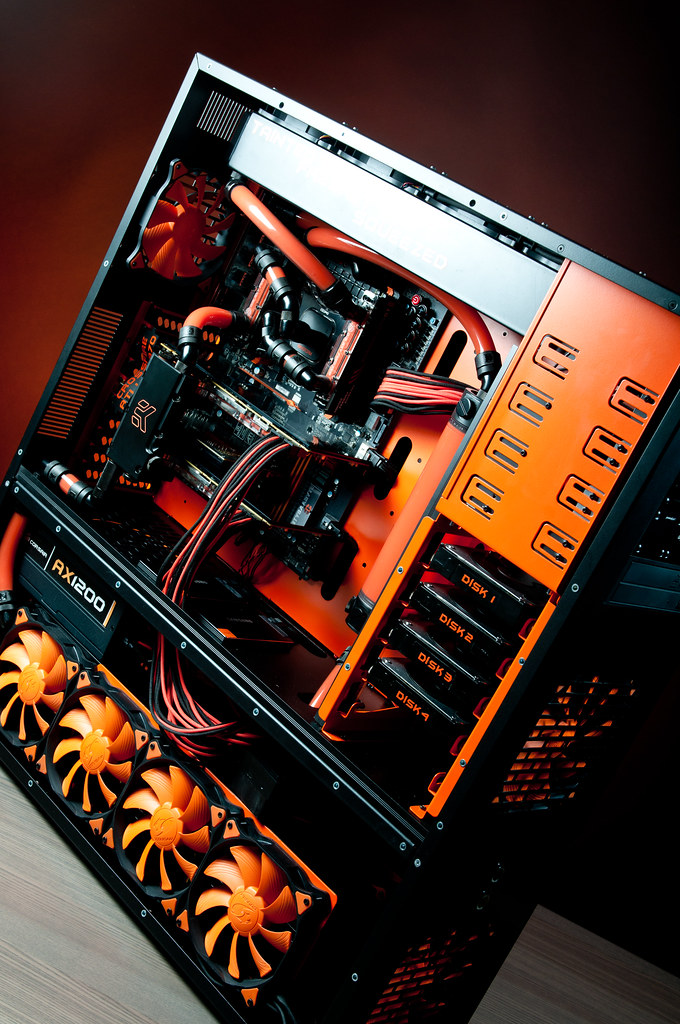
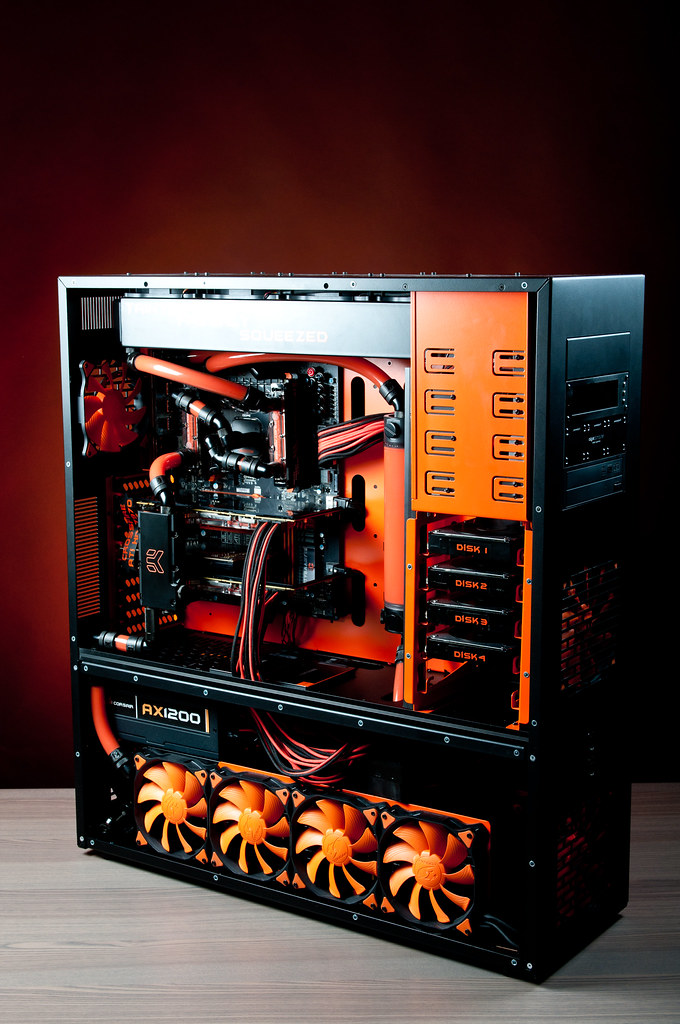
May i present to you.... (finally )
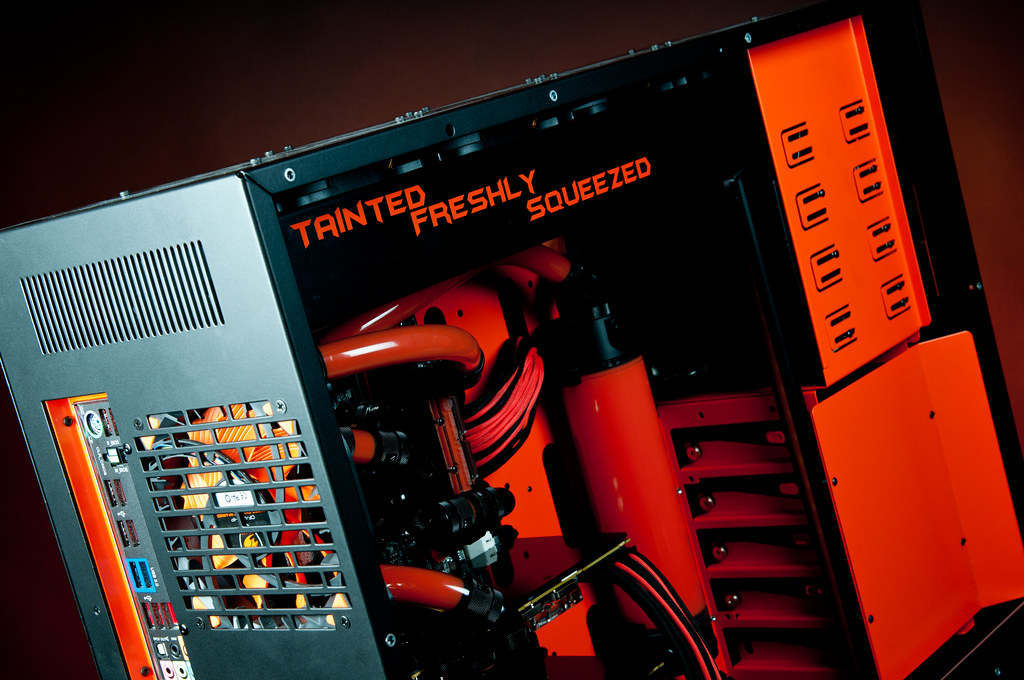
-TAINTED FRESHLY SQUEEZED-
)-TAINTED FRESHLY SQUEEZED-
/Picture spam mode on
Full on body shot...
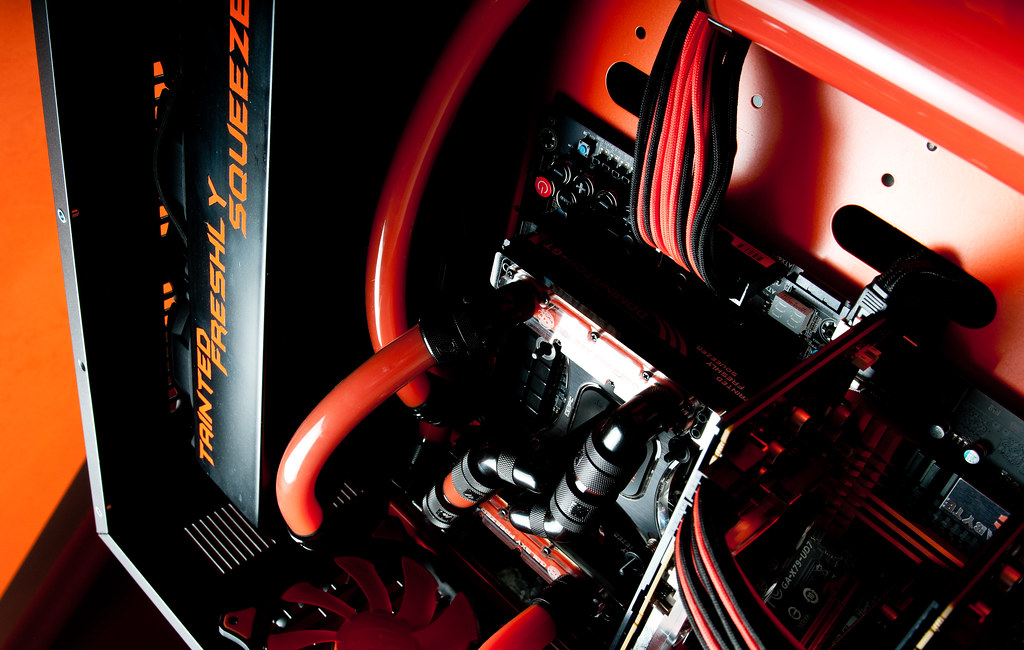
LD Coolings tinted window...
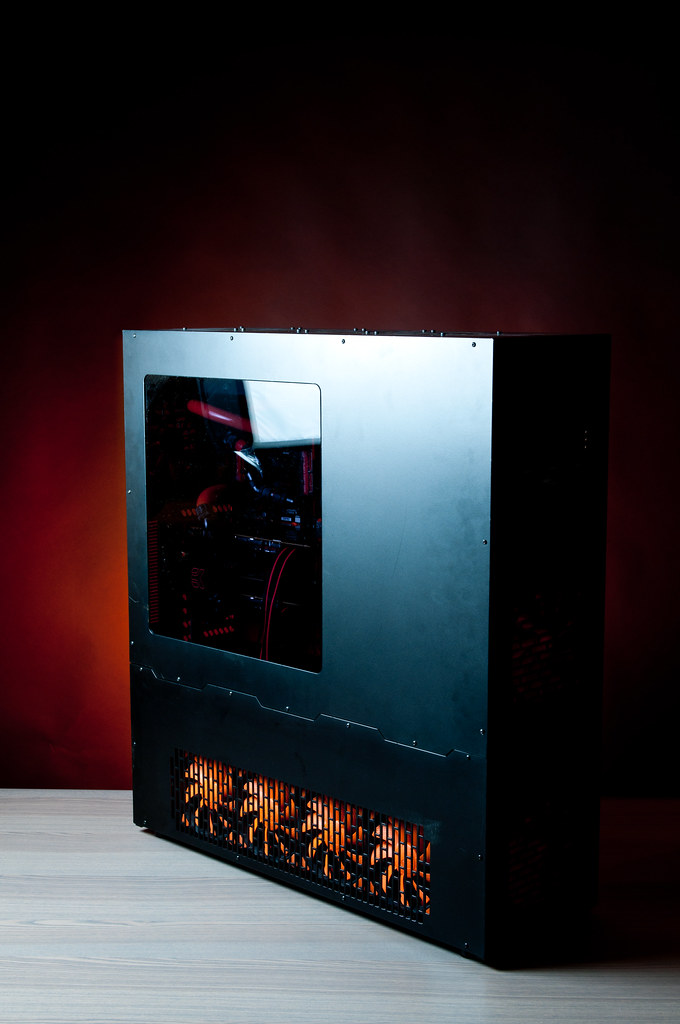
Power.... on!

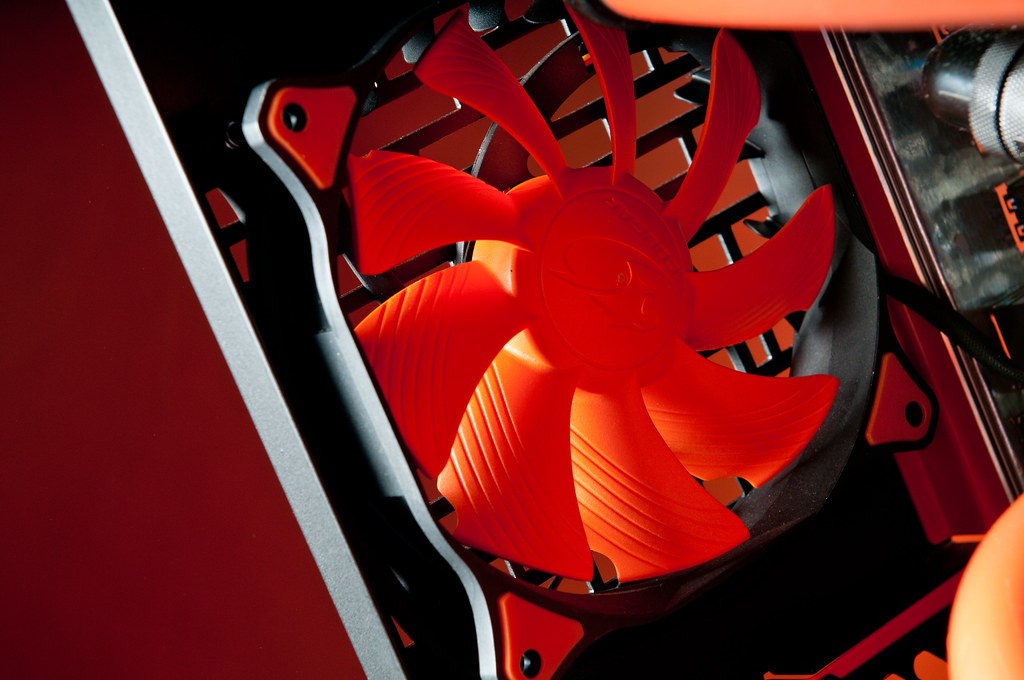
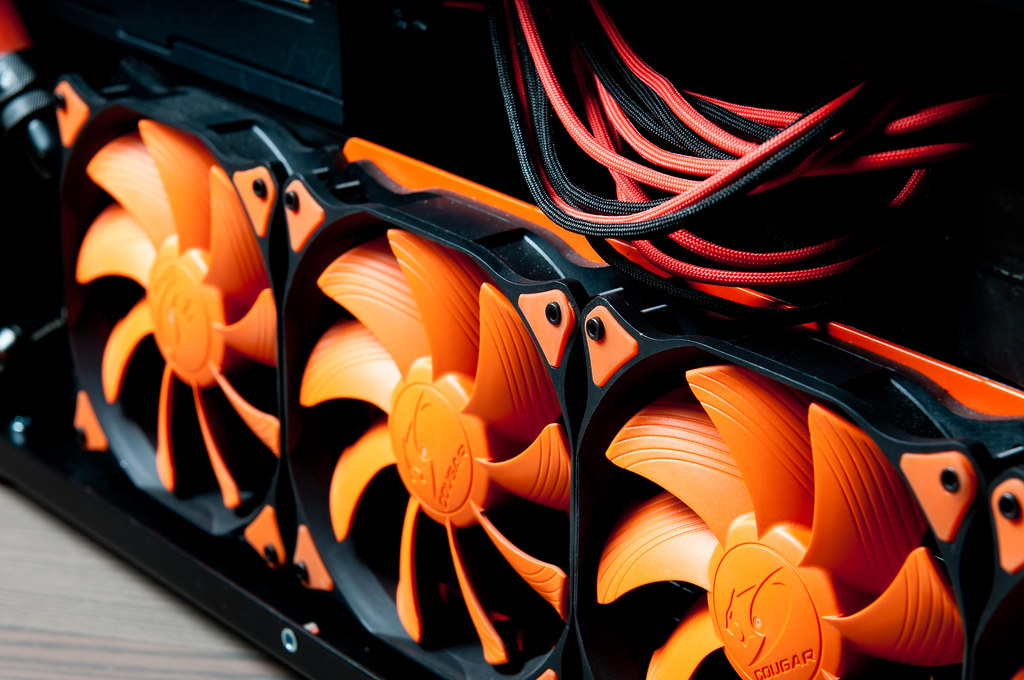
Fans are spinning... good signs

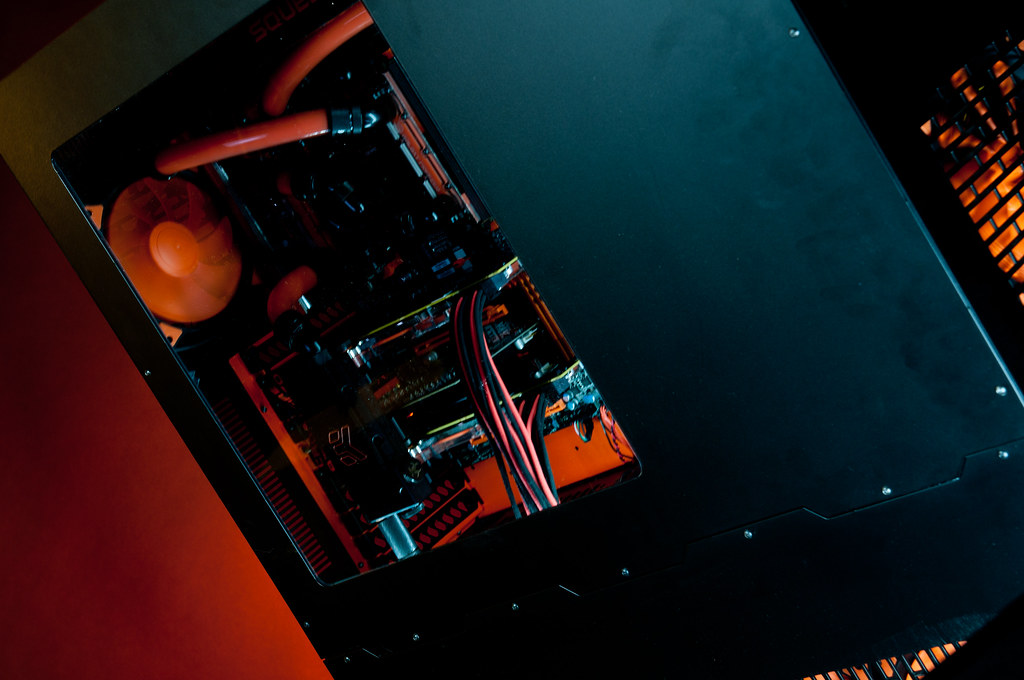
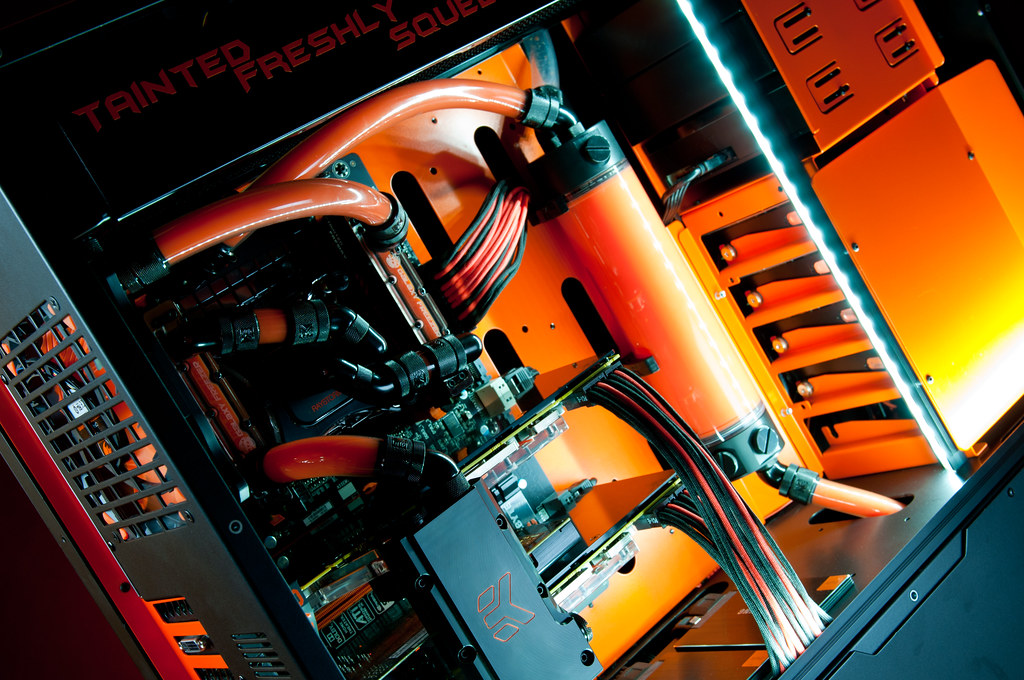
And from the darkness...

Comes the light!
Remove the top panel
Remove the bottom too...
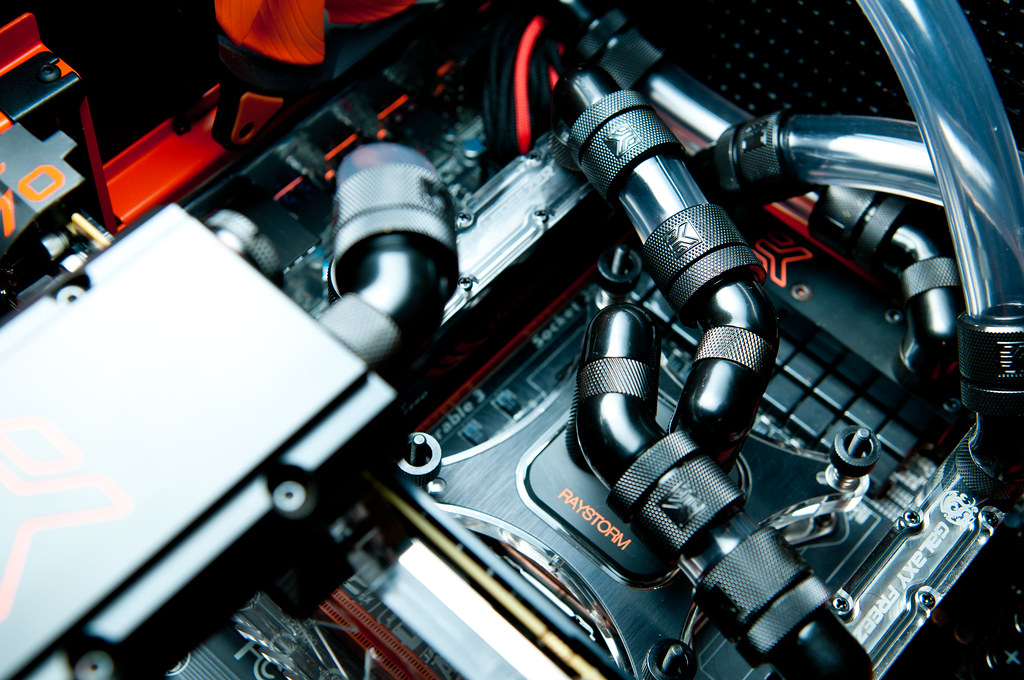
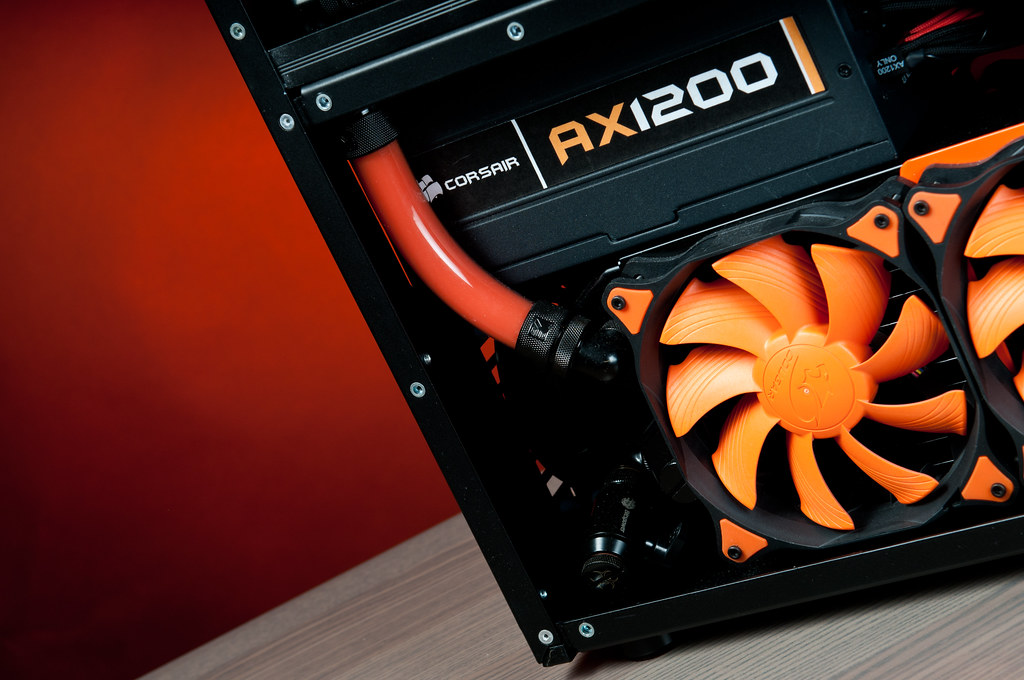
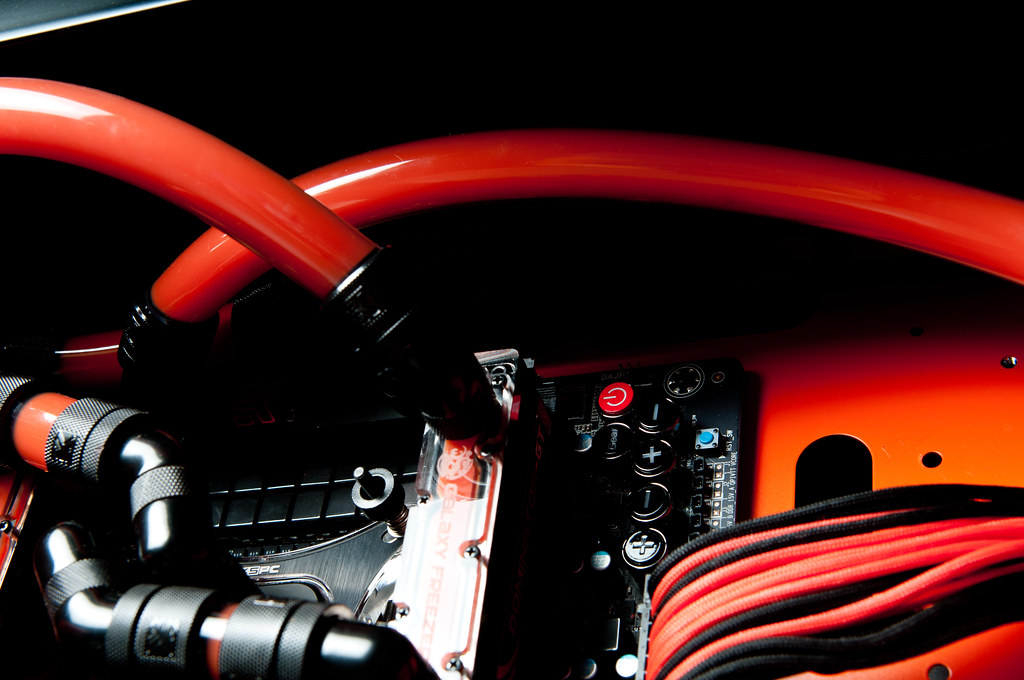
The brains of the cooling Aquaero 5 Pro + 3X PA2 Ultra.
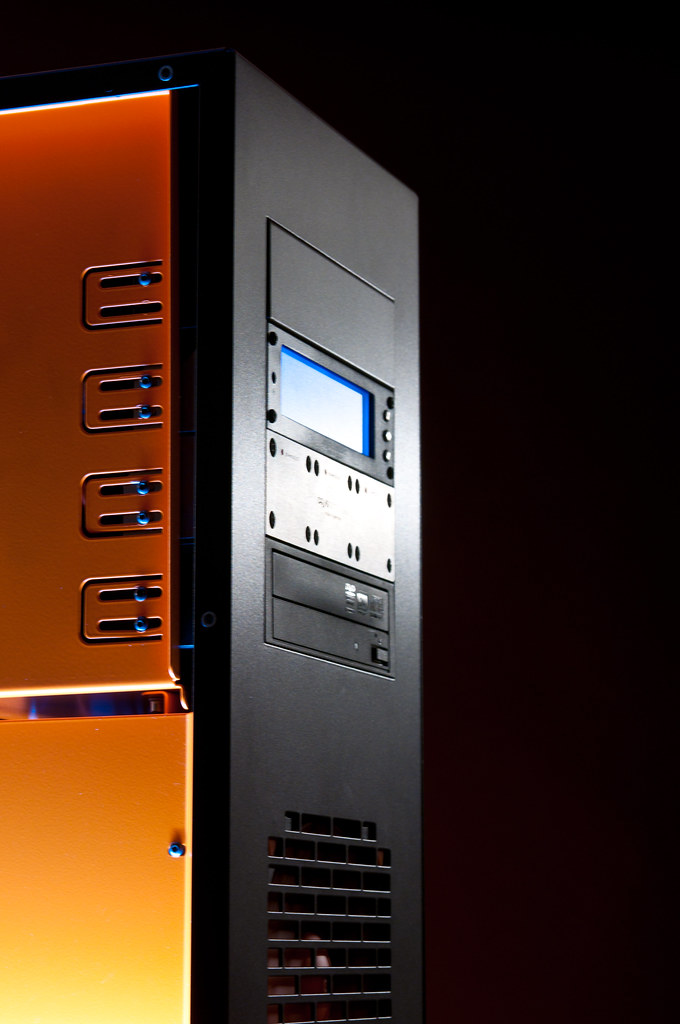


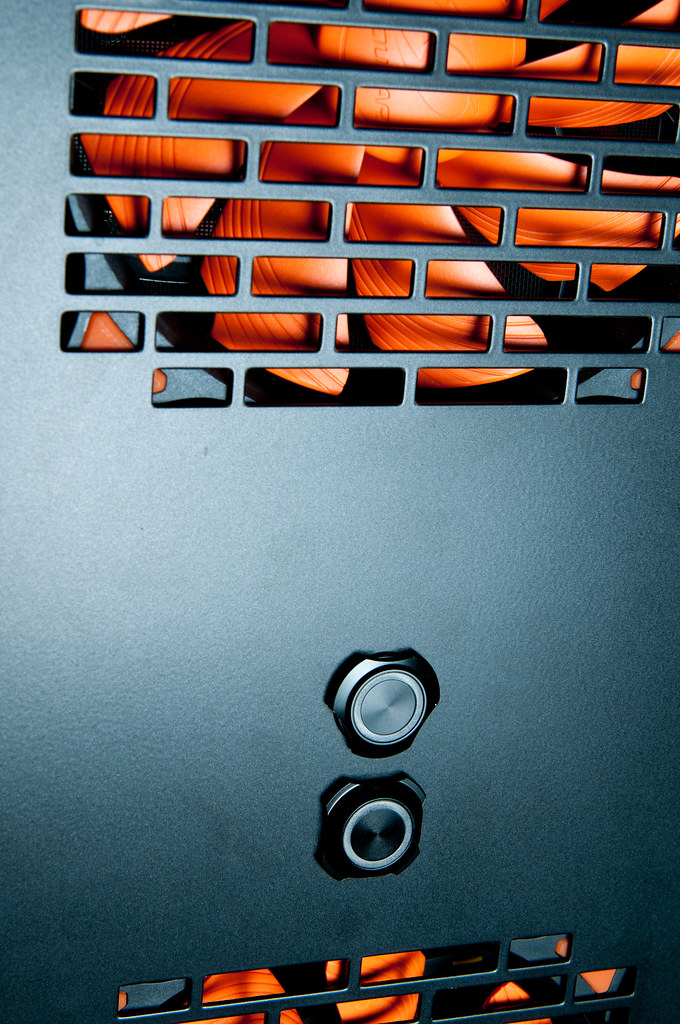
Lamptron new design buttons...
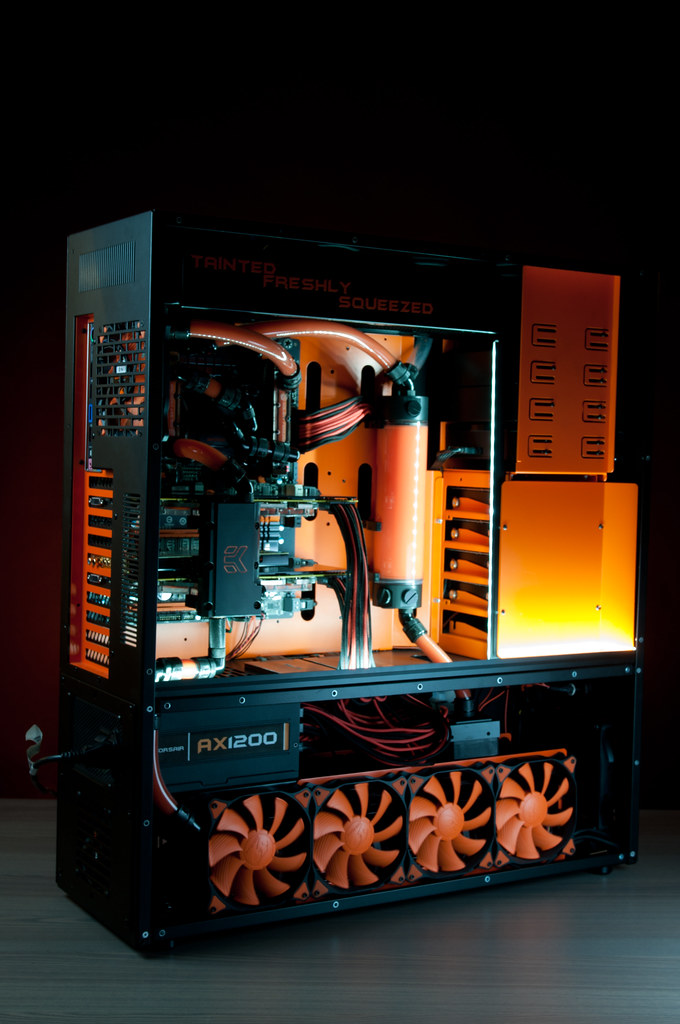
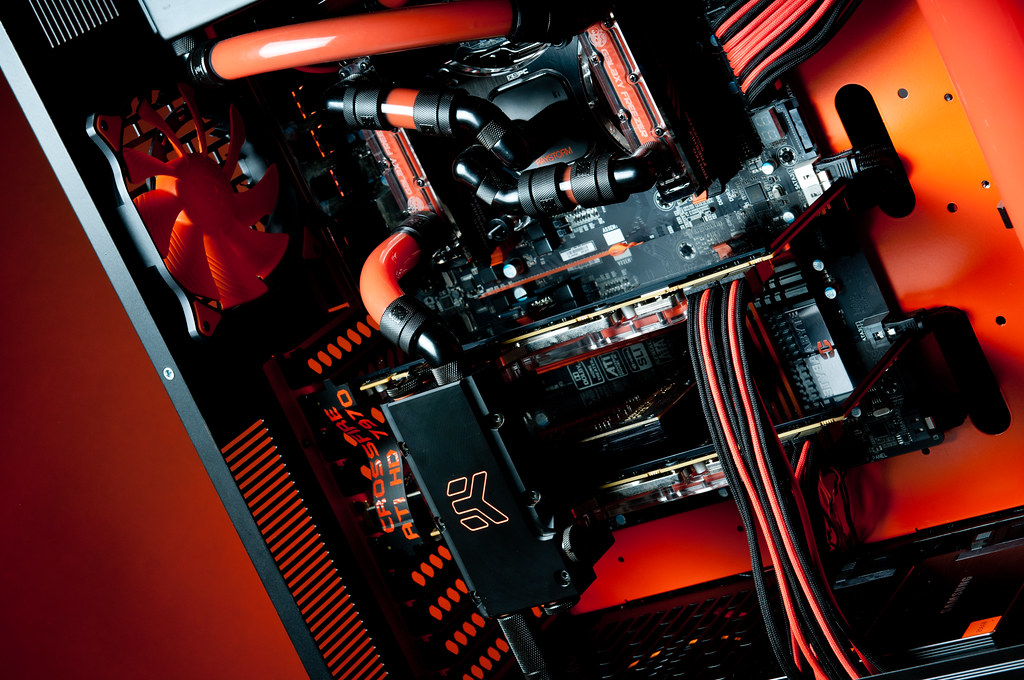
Full on body with panels off.
Now im going to shut up and let you see pics


Final photo (for now, and until Rev.1
)
First off i want to say a HUGE THANK YOU to FREDDY from HighFlow Computer Cooling Shop Who helped me complete my vision and for the EXCELLENT cooperation we have had time and time again!

I also want to say that this build is FAR from over, with several new revision in mind already, i will slowly be updating and changing the build as time progresses. Also i plan to overclock this thing as much as possible, and i will be posting results of my findings and troubles.
Thank you everyone for your comments and support, you guys gave me great inspiration from your own build lgos, even though i coudlnt read or understand most of them (google translate sucks bad)! I also want to say a special thank you to Freddy again... This is the second time he has helped me with a sponsorship, and i truly owe him a GREAT deal. Without joke, this build would never have even started if it wasnt for freddy.
Until next time...
Happy Modding!
dietje1908
Junior Member
Fantastic! Great color scheme and great execution. The best LD I have seen on the forums, congratulations
Verstuurd van mijn GT-I9100 met Tapatalk
Verstuurd van mijn GT-I9100 met Tapatalk
Vergelijkbare onderwerpen
| Onderwerp starter | Titel | Forum | Reacties | Datum |
|---|---|---|---|---|
|
|
-Freshly Sliced- | Gallery & Build Logs | 50 |